
Drip campaigns are marketing magic.
You create a sequence that nurtures leads from first contact to raving fan, or new users to pro wizards.
You set up the content and sequence, then every new person to join the audience gets the specially designed sequence, no matter when they sign up or are introduced to your brand.
Today I’m going to show you how to do drip campaigns to segmented audiences in Facebook Messenger with a simple example.
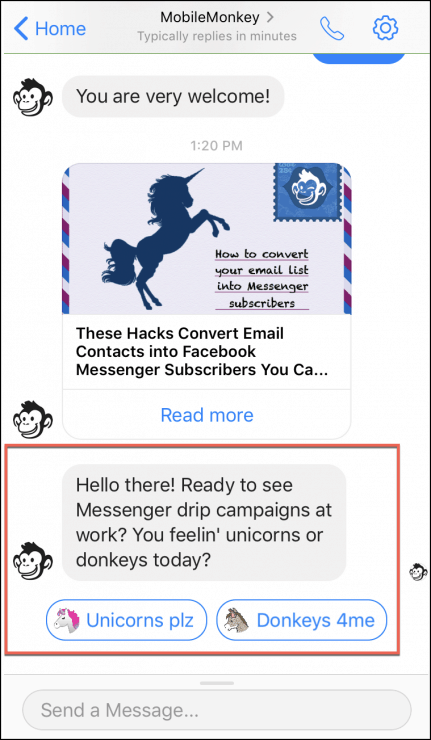
First thing’s first, give this bot a spin here.
Choose one or the other: unicorns or donkeys?
There are tons of neat usages for Messenger drip campaigns:
- Onboarding
- Lead nurturing
- Follow-up survey
Any purchasing cycle you use marketing automation for you also want to do via chat.
Messenger drip campaigns are the same idea but with higher visibility than other channels including email.
Creating a Drip Campaign in Facebook Messenger
Here’s how we built the unicorn-delivering drip campaign in MobileMonkey.
Step 1. Create your Audience Segments
It’s so easy to segment your audience in MobileMonkey with custom variables.
Here we asked if you want to see unicorns or donkeys with the quick question widget and multiple choice buttons:
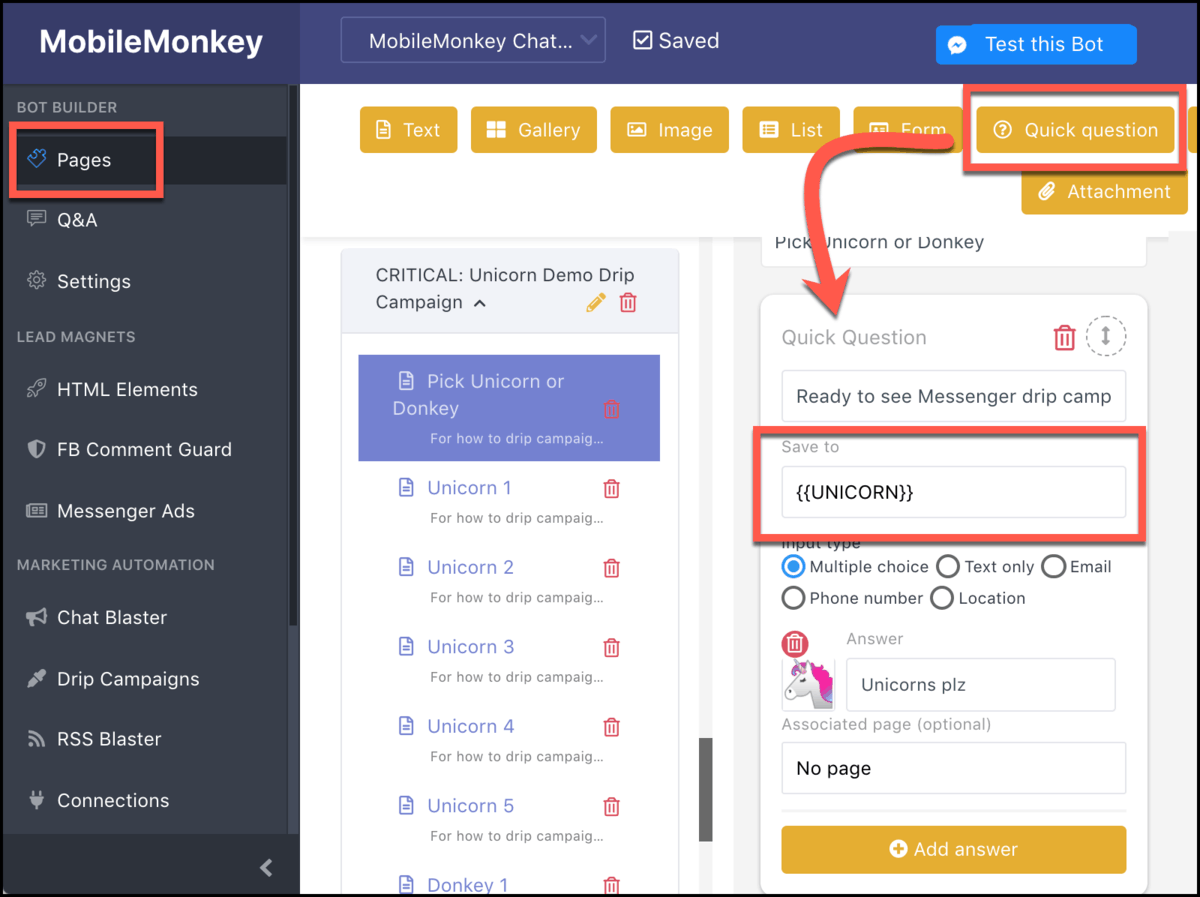
Conversion forms and quick questions are the widgets that set custom customer attributes.
Depending on the way someone answers the question, we drop that attribute to their contact profile.
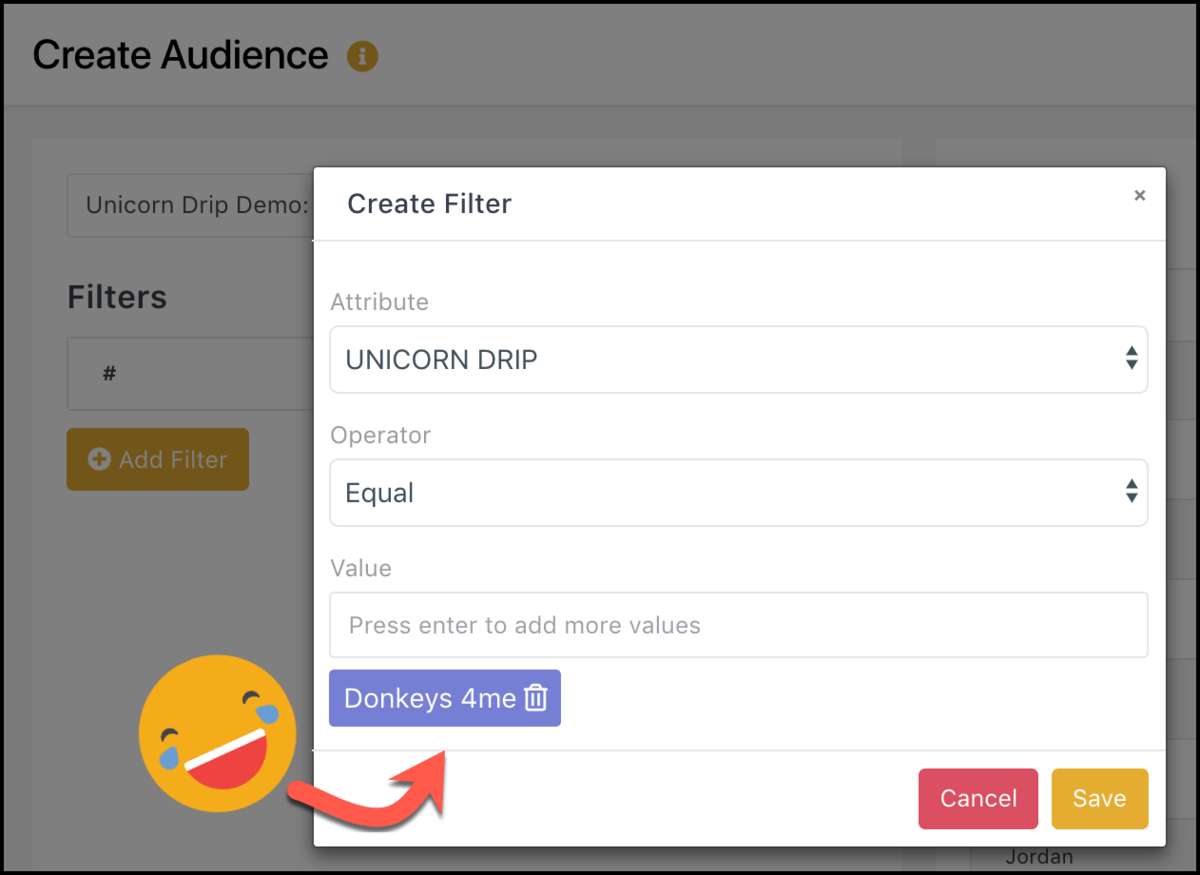
Then, we create two custom audience segments from the Audiences manager: unicorn lovers and donkey fans. #teamunicorn

You might create custom audiences based on interest in services, customer budget, or webinar attended.
Pick the variable, in this case “UNICORN,” and type in the attribute value for the audience. Here’s the setup for our donkey crew using the attribute value “Donkeys 4me”:
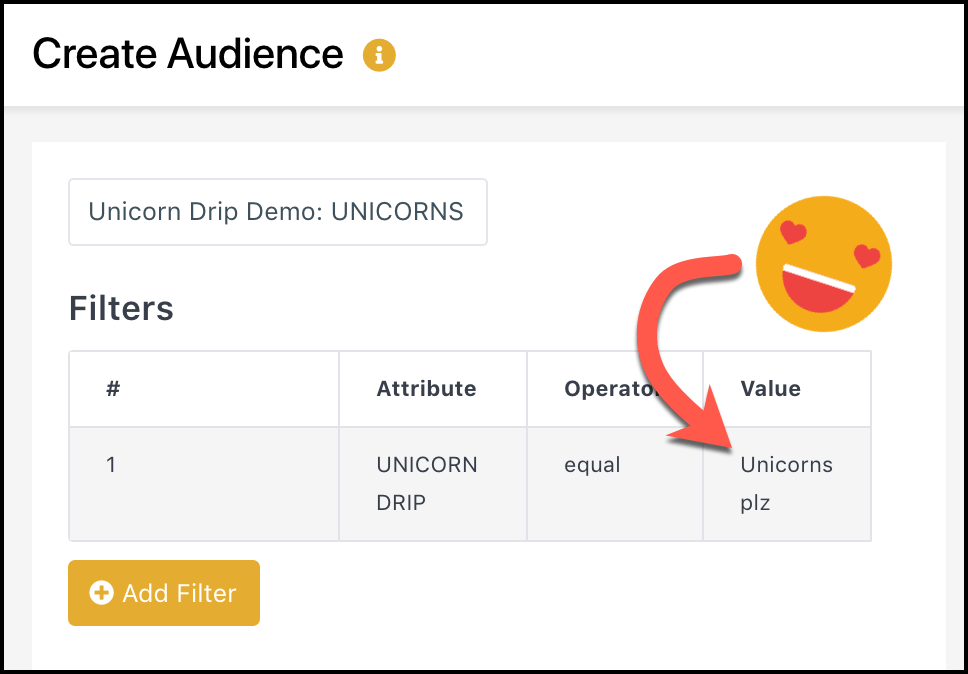
We have an audience set up for donkeys and another for unicorns:
Step 2. Create the Content for Dripping
In our example we’re sending out five donkeys or five unicorns in five minutes.
We used the powerful chatbot builder to build each page with widgets like quick questions, animated GIFs and text with buttons.
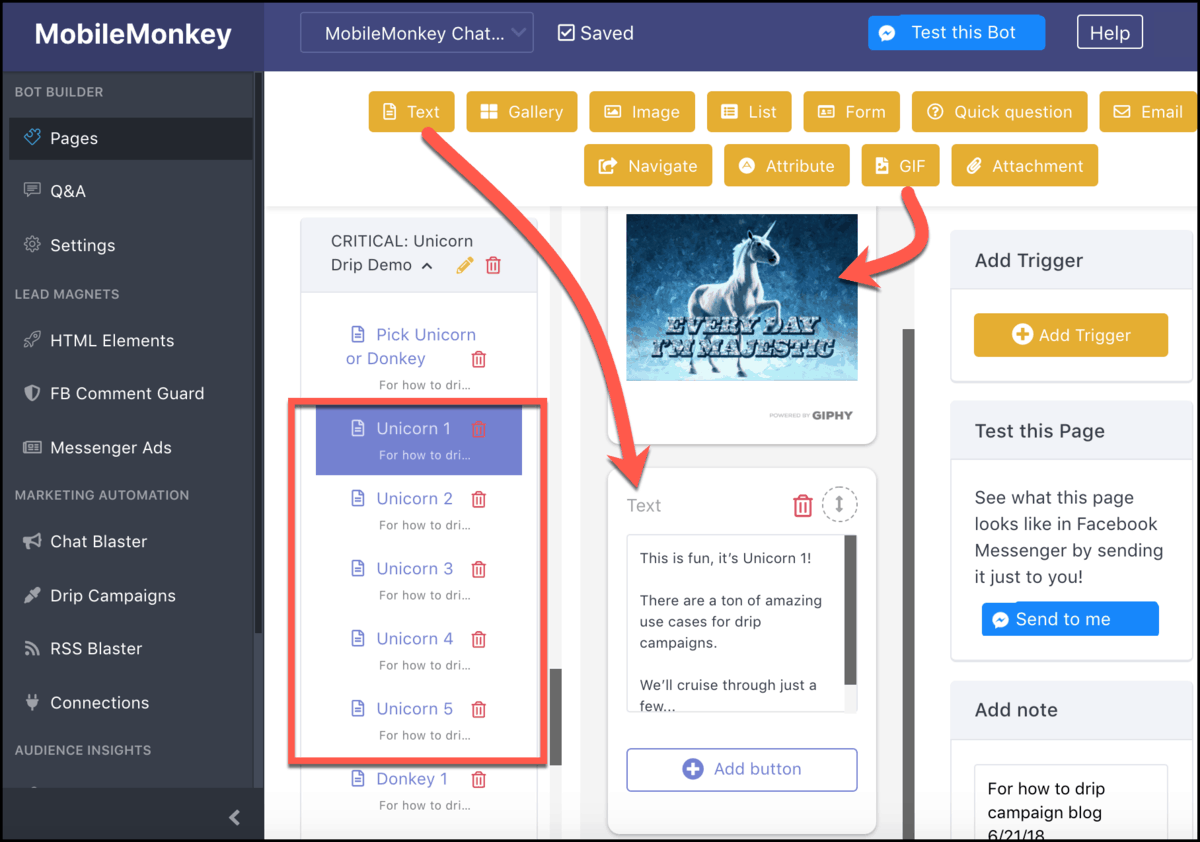
Your drip campaign might start with a welcome message to say “hi” when they sign up. You might follow-up in a few days with a useful tip or resource, and send a survey to see how they’re doing a week later.
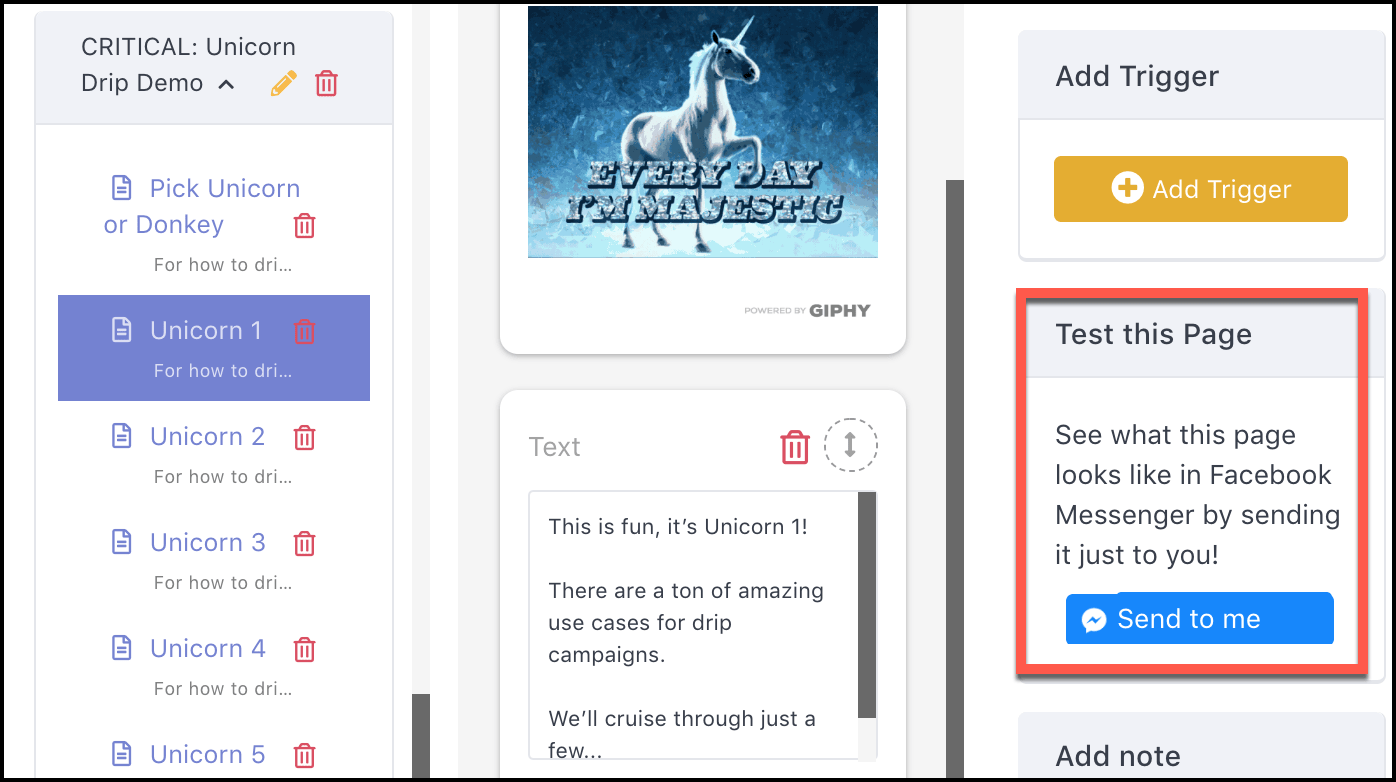
The “Send to me” button lets you test the pages in Messenger to fix any typos or adjust the formatting.
Step 3. Set Up the Drip Campaign
With the content built, we’re ready to set up the drip campaign using marketing automation tools in MobileMonkey.
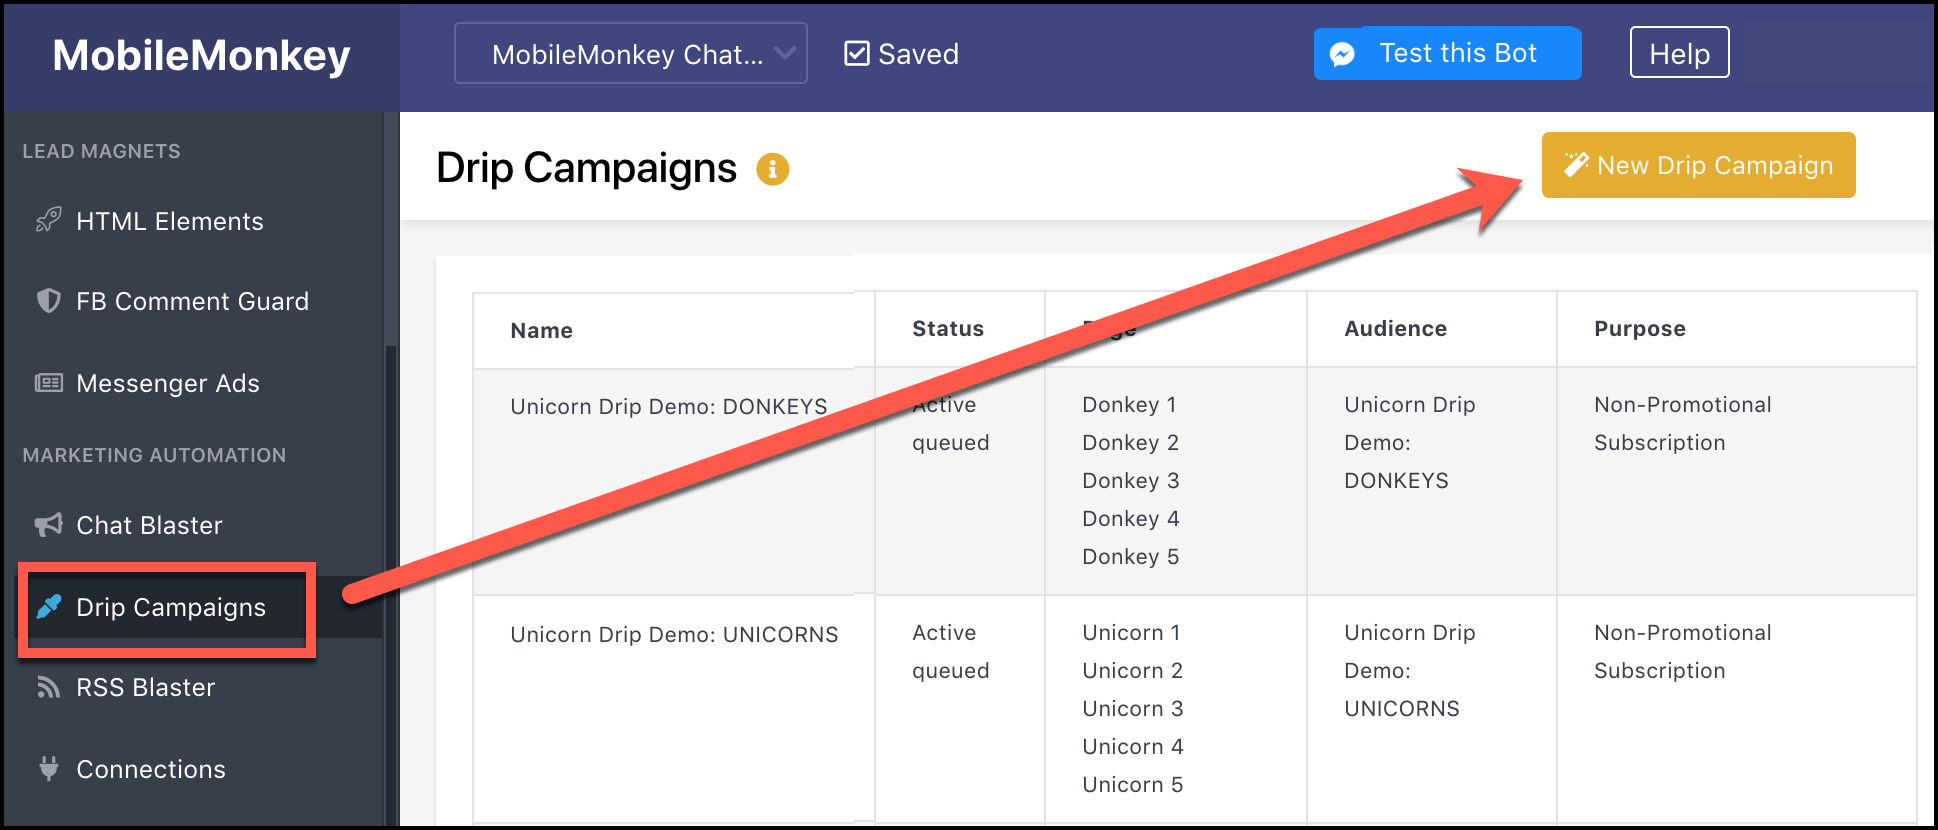
Create a “New Drip Campaign” and the rest is intuitive:
- Name your campaign,
- Choose your audience from the drop-down,
- Select your blast purpose from the menu of options.
Then schedule the timeline of drips using the drop-down, picking each page and when it should be delivered:
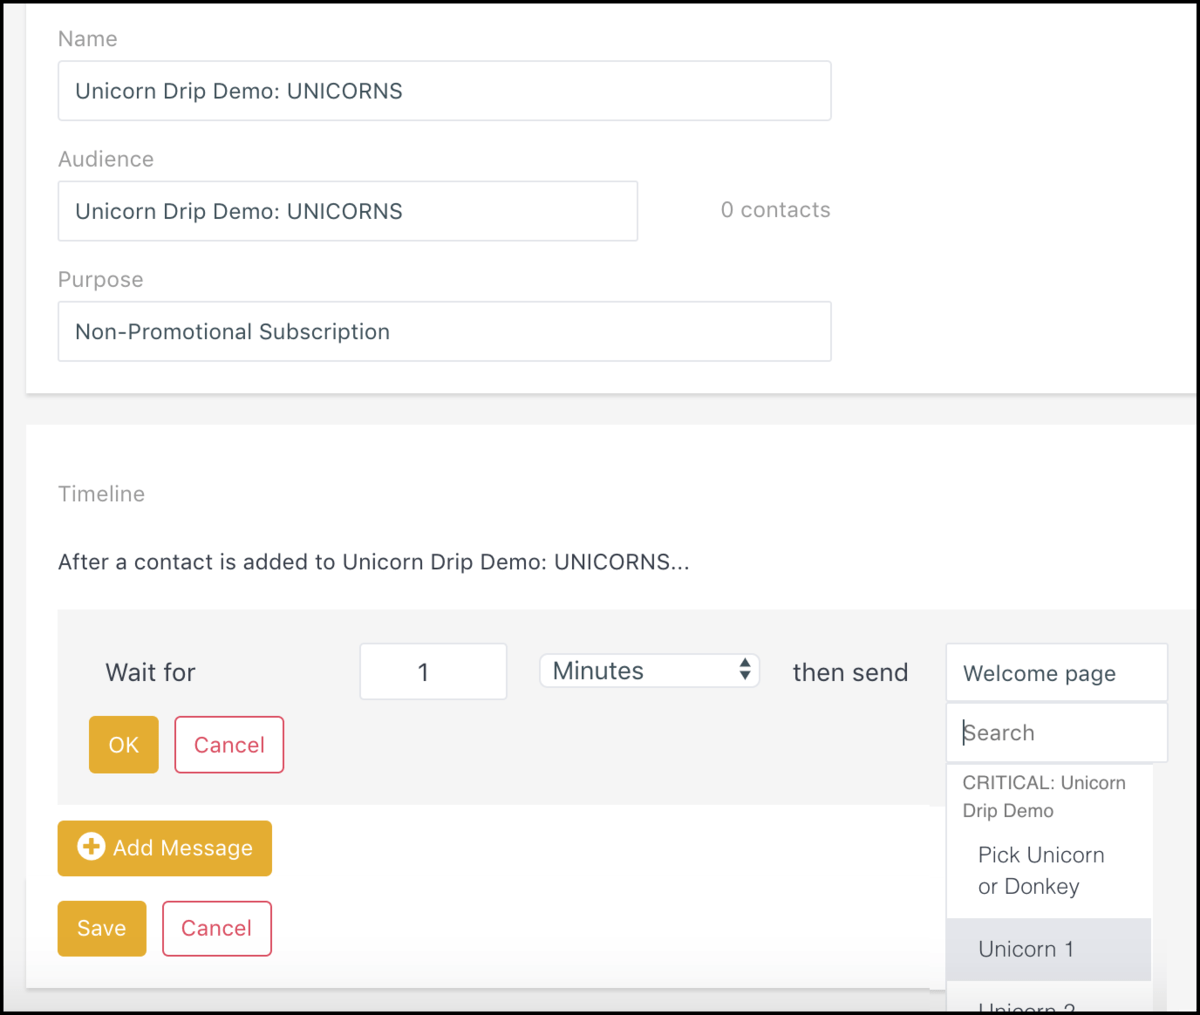
Scheduling options in the drip campaign manager have a range of intervals from minutes to months:

Here’s what our final sequence looks like:
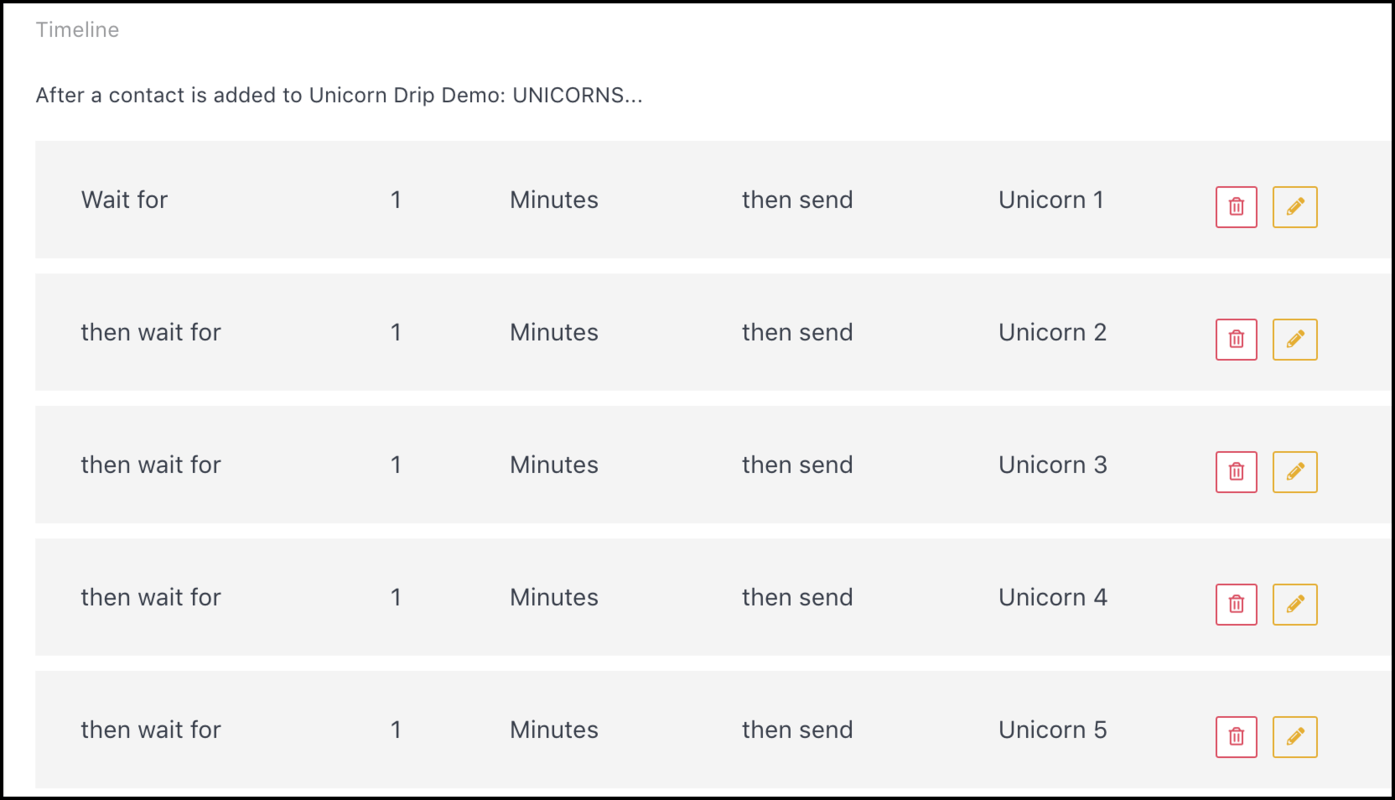
Set it to active and save!
For this example, we created one drip campaign for team donkey and one for team unicorn.
Now every new audience member gets your custom-tailored drip campaign delivering content in the right stage of their customer lifecycle.
What Can You Do with Drip Campaigns in Messenger?
In this drip campaign example we showed how to quickly segment audiences and create custom drip campaigns.
If you’re a marketing agency, ask customers what service they’re interested in and send out different content.
B2B or B2C services, ecommerce marketing, it’s the same!
Whenever someone signs up, you’ve got a nurturing stream of content ready to go.
Interested shoppers are introduced to your solution, see your support first-hand, and fall in love with your brand.
Maybe that’s not magic, just great marketing.
Republished by permission. Original here.
Photo via Shutterstock
This article, “Master the Art of Messenger Drip Campaigns with these 3 Steps” was first published on Small Business Trends
